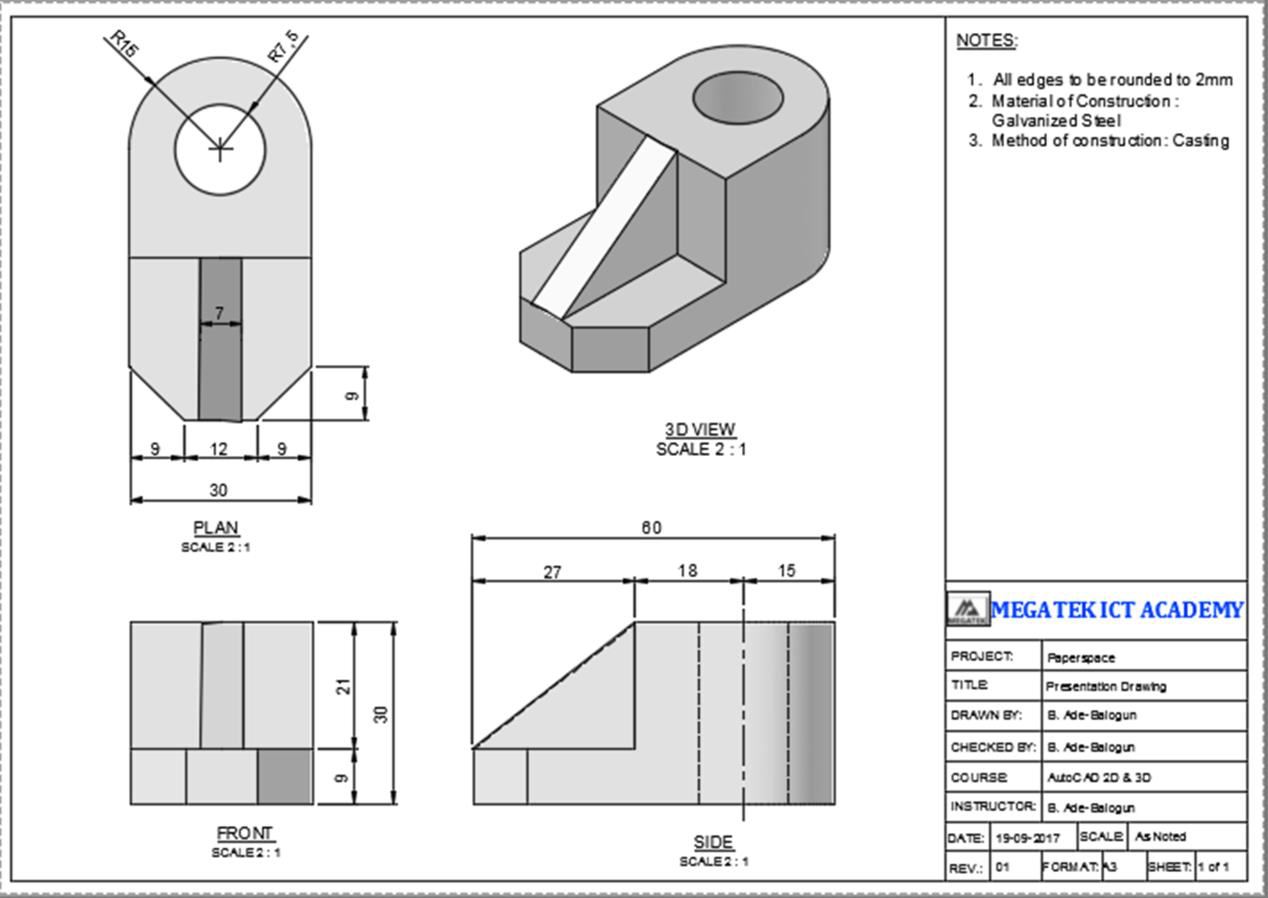
Remember the 3D casted block we practiced previously? https://ictacademy.com.ng/solid-modeling-using-autocad/
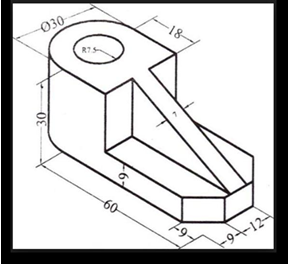
Well, we will proceed to put it in a presentable format on A3 Paper size using AutoCAD 2016.By presentable format, I mean a drawing format of the casted block in paper space showing all information of the block (such as dimensions, material etc.) needed to help produce the block in the factory or workshop.
STEPS
1. Open the casted block (Native) file.

2. Under Annotation Panel in the Ribbon, click on the arrow sign on the extreme right bottom end of the Text panel.

3. The Text Style dialogue box will come as shown below.
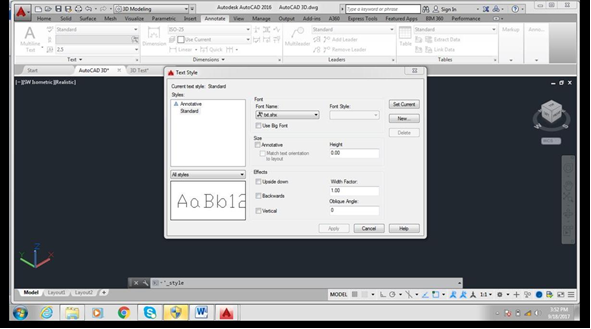
4. Create a new text style and give it the name AutoCAD 3D
5. Then set font name to be Arial, Height to be 4 and click on apply button, then close the dialogue box.
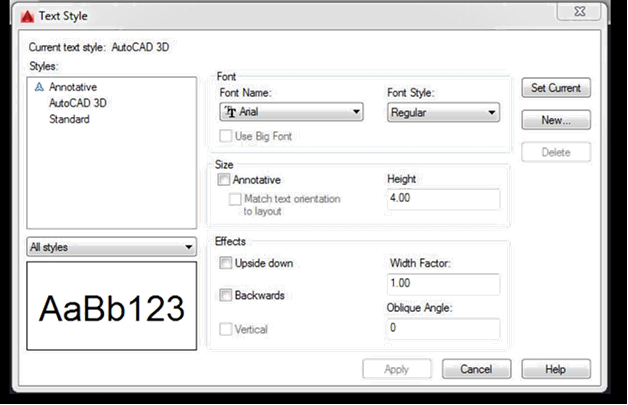
6. Under Annotation Panel in the Ribbon, click on the arrow sign on the extreme right bottom end of the Dimension panel.

7. The dimension dialogue box will come up as shown below.
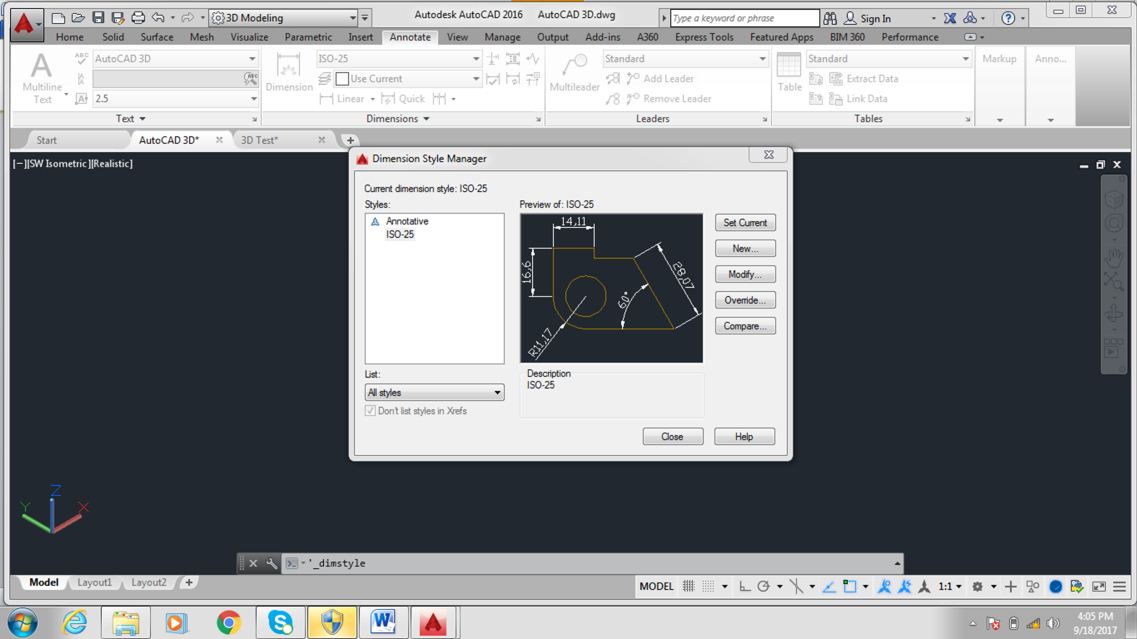
8. Create a new dimension style and give it the name AutoCAD 3D dim
9. Under the symbol and arrow panel set the arrow size and center mark as 4
10. Under the Text panel set the text style to AutoCAD 3D.
By selecting this text style, the dimension text will assume all properties you initially set for the Text style (such as text height, font type). Set offset from dim line to 1.5. see the images below
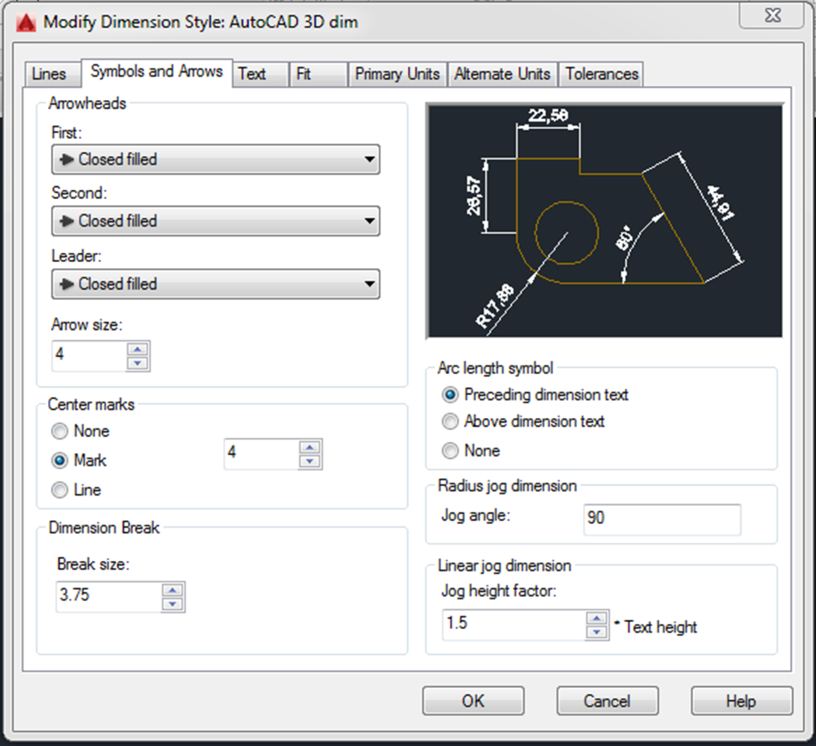

11. Once all setting is complete, click on ok and close the dialogue box.
12. Click on paper space 1 to activate it.
You will be presented the paper space environment as shown below.
A default paper with the casted block on it will appear as shown below, delete it. We want to specify our own paper size and import our working back-sheet (i.e. Title Block).

13. Right click on paper space 1 and select page set up manager.
A dialogue box will come up, click on the modify button. The image below will come up.
14. Change the settings variables as shown below. Click ok and then close.
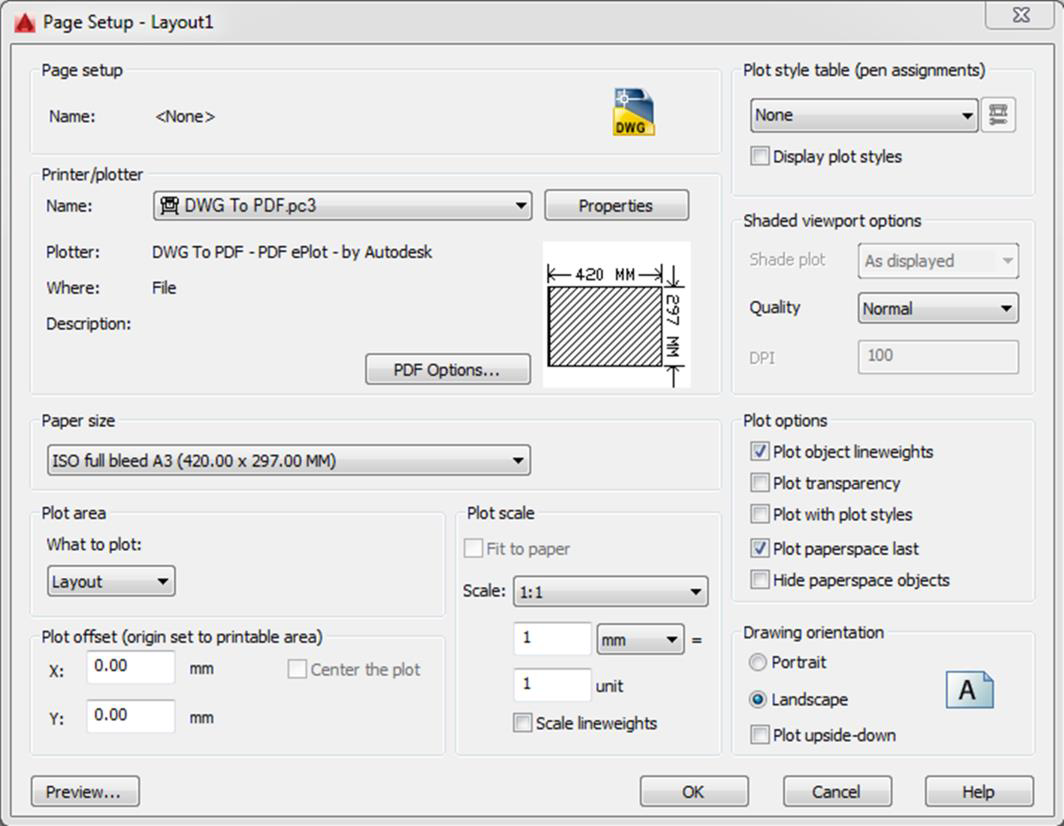
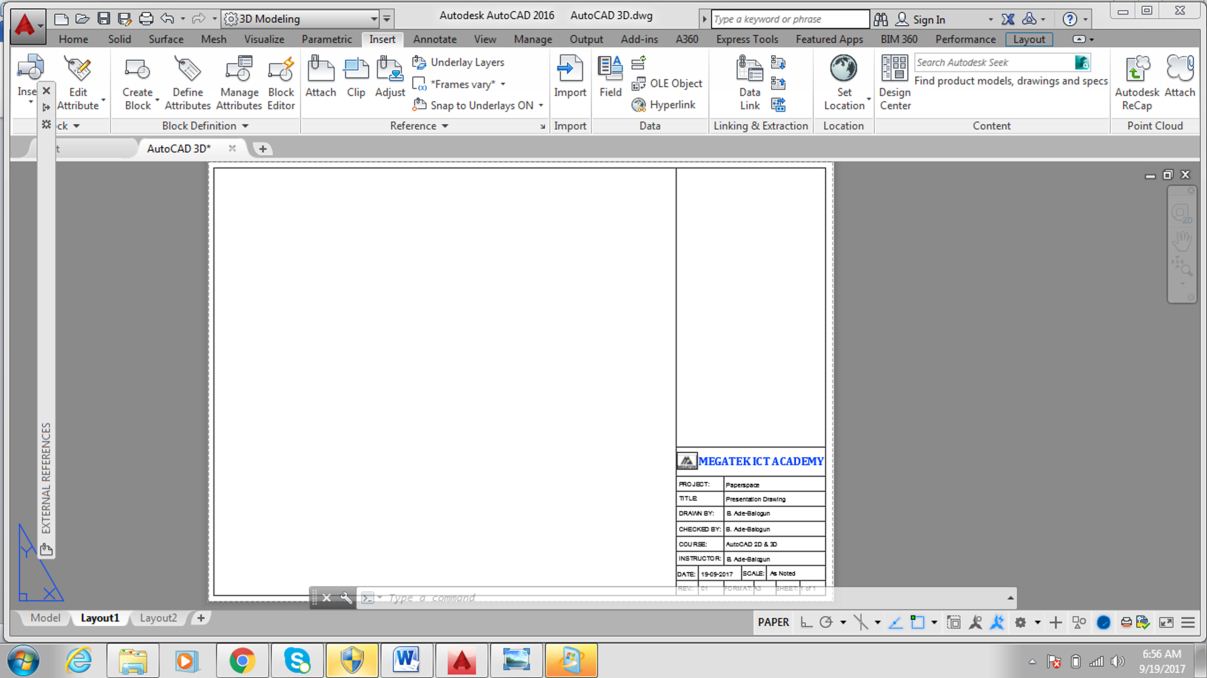
15. A blank paper will appear as shown below.
16. Insert your Company Title Block and enter necessary variables. See images below.
17. There is a tab in the Ribbon named Layout (it’s a new feature in recent versions of AutoCAD) that enable you create Orthographic projections (1st Angle or 3rd Angle) of your work.
18. We will be creating a 3rd Angle project of the casted block.
19. Click on Base panel arrow in the Ribbon and select from Model Space from the drop down menu.
Automatically the casted block will load and appear with your cursor on paper.
Layout Tab
Base Panel Arrow
Automatically a new Tab (Drawing View Creation) will come up in the Ribbon. This new contains panels that will enable you modify the appearance, scale and orientate your drawing creation.
20. Create your views (Front, Side, Plan elevation and a 3D View)
Under appearance panel, set the scale to 2:1 and appearance to Shaded with Visible Lines. See image below.

21. Add title to each of the created views using Multi Line Text tool under Text Panel in the Annotation Tab of the Ribbon.

22. Add dimension to the created views using Dimension tool under Dimension Panel in the Annotation Tab of the Ribbon.
23. Lastly, add notes if necessary.
Content of the note can be Material of construction, method of construction etc. see images below.

