
When working with spreadsheets, one of the biggest risks is incorrect data entry. Typos, invalid numbers, inconsistent formats, and duplicate entries can easily destroy data quality.
Microsoft Excel’s Data Validation feature allows you to control what users can enter into cells. It helps enforce rules, reduce errors, and maintain clean, structured data.
This article explains what Data Validation is, how to use it, and advanced techniques professionals rely on.
What Is Data Validation?
Data Validation is an Excel feature that restricts the type of data allowed in a cell.
You can control:
- Numbers within a range
- Dates within a period
- Text length
- Custom formulas
- Dropdown lists
It ensures users only input valid and meaningful data.
Why Data Validation Is Important
Without validation:
- Users may enter negative sales values
- Dates may be entered incorrectly
- Categories may be inconsistent
- Reports may become unreliable
Data Validation improves:
- Data accuracy
- Professionalism
- Automation
- Reliability of dashboards and Pivot Tables
Clean input leads to clean analysis.
How to Create Basic Data Validation Rules
Step 1: Select the Cell or Range
Choose the cells where you want restrictions applied.
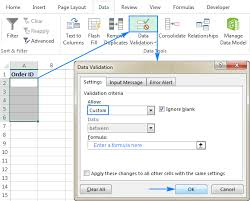
Step 2: Open Data Validation
- Go to the Data tab
- Click Data Validation
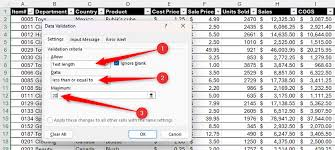
Restricting Numbers Within a Range
Example: Allow only numbers between 1 and 100.
- Select cells
- Data → Data Validation
- Allow → Whole Number
- Set Minimum = 1
- Set Maximum = 100
Now Excel prevents invalid entries.
This is useful for:
- Age ranges
- Score limits
- Budget thresholds
Creating Drop-Down Lists
One of the most common and powerful uses of Data Validation is creating dropdown menus.
Example: Restrict “Department” to:
- HR
- Finance
- Marketing
- IT
Steps:
- Select the cell
- Data → Data Validation
- Allow → List
- Enter values separated by commas
OR reference a range
Now users can only select from the list.

Using Custom Formulas in Data Validation (Advanced)
This is where professionals gain full control.
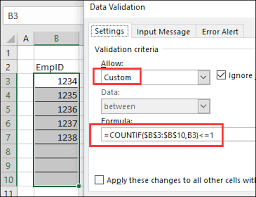
Example: Prevent duplicate entries.
Formula:
=COUNTIF(A:A, A1)=1
What this does:
- Counts how many times a value appears
- Allows entry only if it appears once
Use cases:
- Prevent duplicate employee IDs
- Prevent duplicate invoice numbers
- Enforce unique usernames
Setting Input Messages and Error Alerts
Data Validation also allows:
Input Message
Displays instructions when a cell is selected.
Example:
“Please enter a value between 1 and 100.”
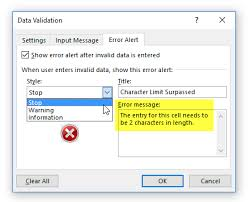
Error Alert
Displays message when invalid data is entered.
Options:
- Stop (blocks entry)
- Warning (allows override)
- Information
This improves user guidance and professionalism.
Dynamic Drop-Down Lists (Professional Technique)
Instead of typing list values manually, you can:
- Create a separate list sheet
- Reference that range
- Use named ranges
This allows automatic updates when new items are added.
For even more flexibility, combine with:
- Excel Tables
- INDIRECT function
Dynamic validation is essential in business dashboards.
Common Mistakes to Avoid
- Applying validation to wrong cells
- Forgetting to copy validation rules
- Allowing blanks when not necessary
- Not testing custom formulas
Always test validation rules thoroughly.
Data Validation vs Conditional Formatting
| Feature | Data Validation | Conditional Formatting |
|---|---|---|
| Prevents invalid entry | Yes | No |
| Highlights invalid data | No | Yes |
| Controls user input | Yes | No |
Best practice:
Use both together for maximum control.
Conclusion
Data Validation is one of the most powerful yet underutilized features in Microsoft Excel. It allows you to control data entry, reduce errors, and build professional-grade spreadsheets. Whether creating dropdown lists, enforcing number ranges, or preventing duplicates, mastering Data Validation significantly improves data integrity and reporting accuracy.
For professionals handling business data, this feature is essential.