
Good Morning.
How was your night?
Today, I want to teach you how to create databases and tables manually on MS Access.
Suppose you need to store different types of information for different types of people. For example, you might want to maintain information about employees, customers, and suppliers. In addition to the standard information—such as names, addresses, and phone numbers—you might want to track these other kinds of information:
- Employee identification numbers, hire dates, marital status, deductions, and pay rates
- Customer orders and account status
- Supplier contacts, current order status, and discounts
For you to get these done, you need tables and databases. That is why I want to teach you how you can do these manually.
To do these, follow the steps below:
- On the New page, click the Blank desktop database
- In the creation window, in the File Name box, enter MyTables. Then click the Browse button, navigate to the Chapter02 practice file folder, and click OK.
TIP Remember, you can’t create a blank database without saving it. If you don’t provide a file name and location, Access saves the file with the name Database followed by a sequential number in the default location (your Documents folder, unless you have changed it).
- Click the Create button to create the blank database in the specified location.
Let’s enter data in the first record.
- With the empty field below Click to Add selected in the new blank Table1 table, enter Scott, and then press the Tab key to move to the next field.
- Notice that the icon in the record selector has changed to a pencil to indicate that this record has not yet been saved. The value 1 appears in the ID field, the name of the second column has changed to Field1, and the Click to Add label has moved to the third column.
Click the pencil icon in the record selector to save the record before you move on.
TIP Clicking the record selector is necessary only after you enter the first value in a new table. This action sets the ID field value to 1.
- Click the cell below Click to Add, and enter the following information into the next seven cells. Press Tab after each entry.
TIP Don’t be concerned if your screen does not look exactly like ours. In this graphic, we’ve scrolled the page and adjusted the widths of the columns to display all the fields. For information about adjusting columns, see “Manipulating table columns and rows” later in this chapter.
Before we move to the next record, let’s make the field names more useful.
Double-click the ID field name (not the ID value in Field5), and then enter CustomerID to rename it.

TIP Field names can include spaces, but the spaces can affect how queries have to be constructed, so it is best not to include them.
Repeat step 8 for the other fields, changing the field names to the following:
| Field1 | FirstName | Field4 | City | Field7 | Country | ||
| Field2 | LastName | Field5 | State | Field8 | Phone | ||
| Field3 | Street | Field6 | ZIP | ||||

Add another record containing the following field values to the table, pressing Tab to move from field to field:
| FirstName | John | City | Montreal | Country | Canada | ||
| LastName | Yokim | State | Quebec | Phone | 514 555-0167 | ||
| Street | 43 rue St.Laurent | ZIP | (press Tab to skip this field) | ||||
At the right end of the tab bar, click the Close button.
When Access asks whether you want to save the design of the table, click Yes to open the Save As dialog box.

TIP Clicking No will delete the new table and its data from the database.
In the Table Name box, enter Customers, and then click OK to close the table and add it to the Tables group in the Navigation pane.
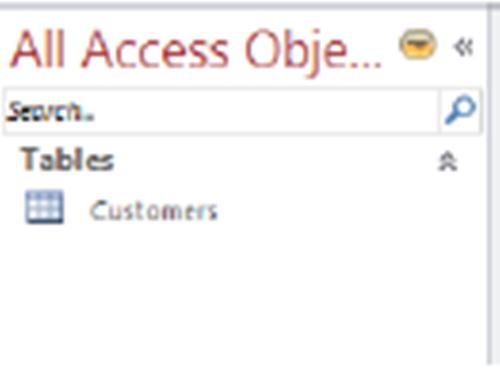
TIP You can rename a table by right-clicking it in the Navigation pane and then clicking Rename. You can delete a table by right-clicking it, clicking Delete, and then confirming the deletion in the message box that appears. (You can also delete a table by selecting it in the Navigation pane and then clicking the Delete button in the Records group on the Home tab, or by pressing the Delete key.)
Let’s create a new table with the same structure as Customers.
In the Navigation pane, click the Customers table to select it.
On the Home tab, in the Clipboard group, click the Copy button. Then click the Paste button to open the Paste Table As dialog box.
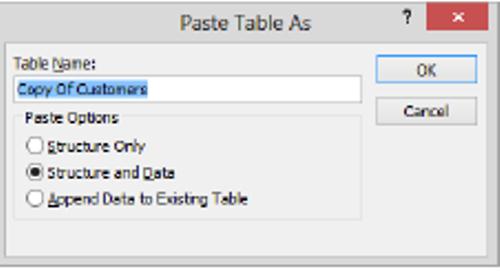
to customize a copy than to create it from scratch.
KEYBOARD SHORTCUT Press Ctrl+C to copy data. Press Ctrl+V to paste data. For a list of keyboard shortcuts, see “Keyboard shortcuts” at the end of this book.
In the Table Name box, enter Employees. In the Paste Options area, click Structure Only to capture the fields from the Customers table but not the customer records. Then click OK to create the table and add it to the Tables group in the Navigation pane.
TIP You can also use the Copy and Paste commands to append the information in the selected table to another existing table. In that case, in the Paste Table As dialog box, enter the name of the destination table in the Table Name box, click Append Data To Existing Table, and then click OK.
Double-click Employees to open it in Datasheet view so that you can view its fields. Then close the table again.
TIP Although you specified that you wanted to copy only the structure of the Customers table, the ZIP field in the Employees table contains 0. This is because Access has automatically assigned this default value to this field. For information about default values, see “Allowing only values in lists” in Chapter 6, “Maintain data integrity.”
Now let’s create another table and add a couple of Quick Start fields to it.
On the Create tab, in the Tables group, click the Table button to create a new table containing an ID field and a Click to Add field placeholder.
With the Click to Add field active, on the Fields tool tab, in the Add & Delete group, click the More Fields button to display a menu containing the Fields gallery. Then scroll to the bottom of the gallery.
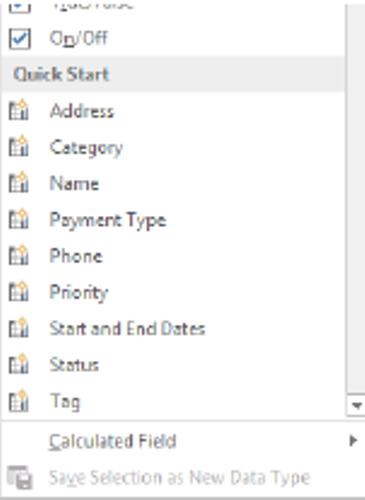
The Quick Start fields are at the bottom of the Fields gallery.
In the Quick Start area of the gallery, click Name to insert ready-made LastName and FirstName fields.
Click the field below Click to Add, and then repeat step 19, this time clicking Address in the Quick Start list to add ready-made Address, City, State Province, ZIP Postal, and Country Region fields.
TIP Notice that the Address Quick Start option includes a Country Region field. In our practice databases, we use the field name Country. However, you might want to use the more explicit Country Region field name if the tables you create will store international addresses.
Close the table, saving it with the name Shippers when prompted.