The 2021 version of Adobe Illustrator brings few interesting new features, although they should prove useful. The really big news – the huge news – is that Adobe has now released a version of Illustrator for iPad, and it’s fantastic. First, let’s get the desktop update out of the way.
Illustrator for desktop
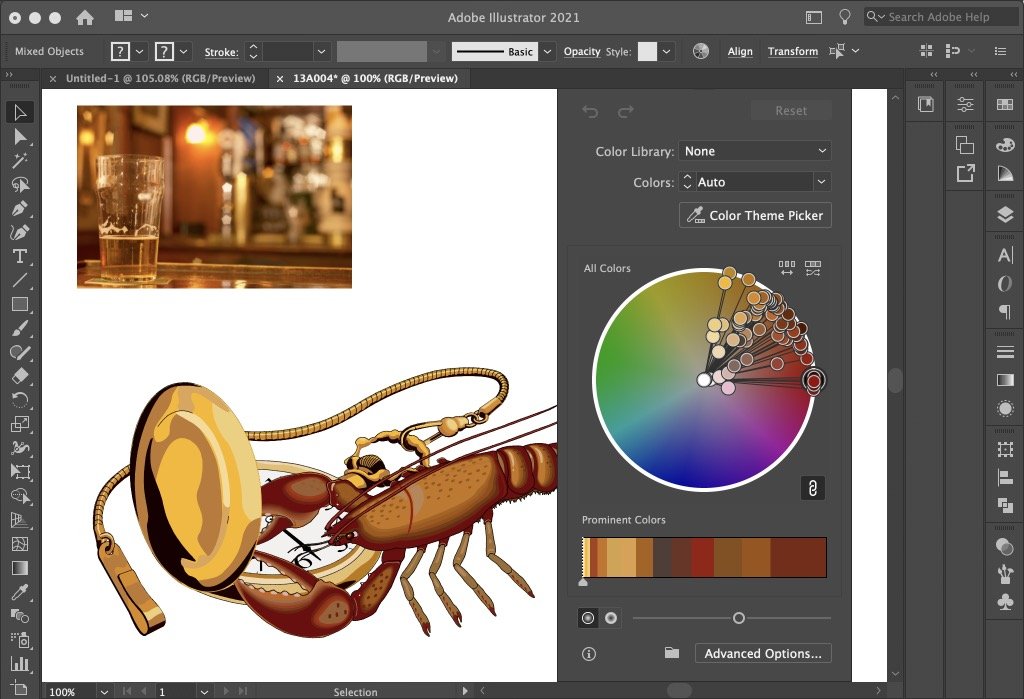
Illustrator is now able to recolor artwork by sampling colors from placed photographs. It’s a straightforward process: you choose Edit > Edit Colors > Recolor Artwork, and the artwork is immediately matched to the photograph. It’s surprisingly faithful, and a color wheel shows pins marking all the colors used so that they can be tweaked individually.
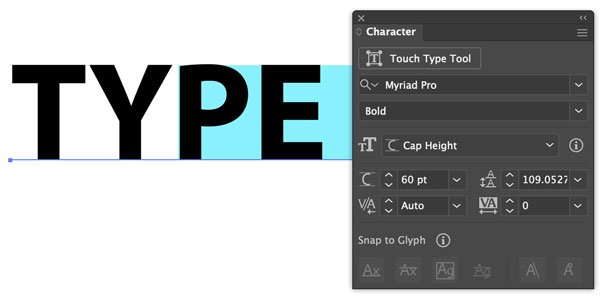
There’s also a new way to set text size, activated by choosing Show Font Height Options from the pop-up menu in the corner of the Character panel. This allows you to set the height of the capitals, the x-height or the current text frame. You can set the height in pixels, for instance, to match the height to a graphic, and it’s a big time saver over the previous manual manipulation method.
You can now make any line or object snap to type edges without having to outline the text first. Here, a simple horizontal rule is easily made to snap to the baseline of this text. It can also snap to the ascender height or either the left or right edge, but it can’t read intermediate values – so you are unable to snap to, say, the top of the lower case letters, or in this case the top of the upper case A as it’s lower than the ascender next to it.

As has long been the case in InDesign, you can now set text to align to the top, middle of bottom of an area text box, or to be vertically justified within it. And that, together with improved Cloud support, is the sum total of enhancements in this version. If it seems a little lackluster, it’s because most of the effort this year has clearly gone into…
Illustrator for iPad
When Photoshop for iPad appeared last year, it was panned by many for its severely curtailed toolset. The first iPad incarnation of Illustrator, however, is a fully-fledged, powerful drawing tool that, in many ways, boasts features that are more intuitive than the desktop version. Although an Apple Pencil is a bonus, you don’t need it in order to use Illustrator on the iPad; the only real benefit is that your finger tends to get in the way when moving anchor points.
As with Photoshop, a Touch Shortcut button provides tool options. Hold it while dragging an object to move it orthogonally; tap and drag it to the side to get the Secondary Shortcut, which enables you to move a copy of the selected object. It’s also used to constrain a rectangle to a square, and an ellipse to a circle, as well as for many other uses for each tool.
Drawing on the iPad
The Pencil tool is the easiest way to draw paths, and recognizes corner points when you make an abrupt change in direction. Increasing the Smoothing amount will produce softer curves: I drew this outline in one fluid motion, complete with the corner point at the right hand end.

Zooming into a drawing uses the intuitive pinch gesture. Double-tap with the Selection tool to enter Direct Selection mode, so that individual points can be addressed. You can now move each point or its Bézier handles at will.
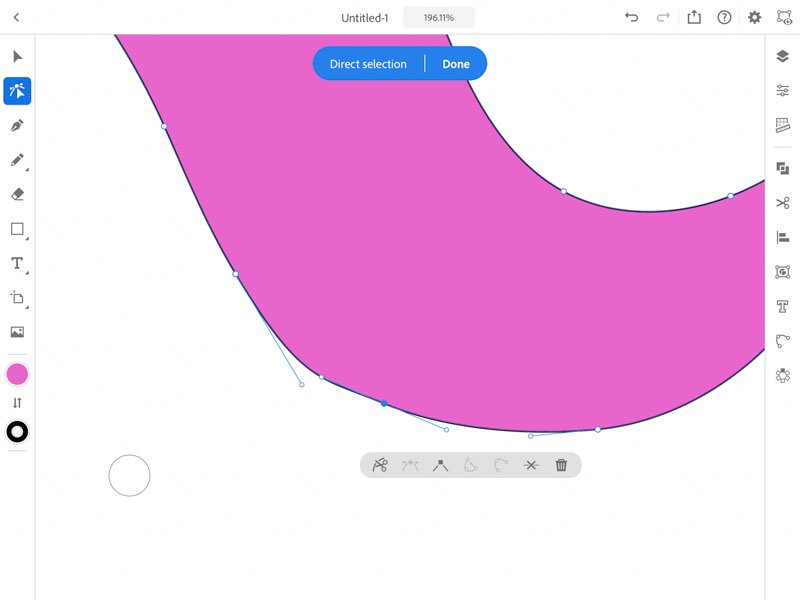
When in Direct Selection mode a range of options appears in a floating panel, allowing you to cut and add points, convert smooth to corner points, and delete points. There’s also a button that removes points and adjusts the handles of the points either side: this is a great way to smooth curves, removing unwanted bumps.

Combining shapes
The equivalent of Illustrator’s Pathfinder panel is the Combine Shapes panel. Unlike the desktop version, which only shows icons for each tool, on the iPad you see previews showing exactly what will happen to your selected artwork. It takes all the guesswork out of the process, and is a major enhancement.

At the top of the Combine Shapes panel is the Shape Builder, which works in a similar way to its desktop incarnation – except that it’s very much more intuitive. Tap a shape to delete it; drag over two shapes to combine them. It’s as simple as that.

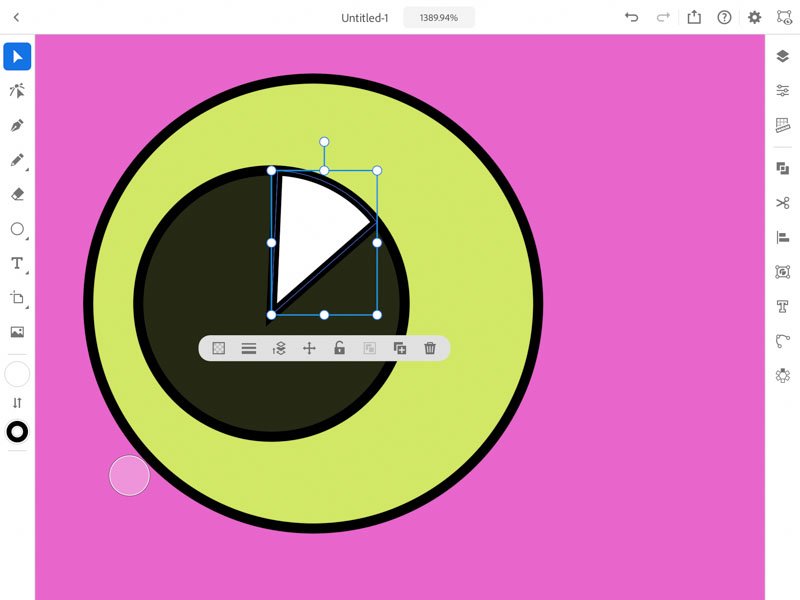
The Shape Builder can be used for many drawing operations. Here, I duplicated the yellow eye by holding the Touch Shortcut button and recolored it, then drew a triangle over it with the Pen tool; and finally, I used the Shape Builder to limit the highlight to the iris area.
Adding color
The Color panel lets you choose colors using a standard color wheel, as well as numerically – and it provides the ability to add transparency as well. Creating gradients is easy, offering linear, circular and dual gradient points that are adjusted by tapping and dragging.

Merging objects
I drew this wing with the Pencil tool, then created two duplicates. Using the Combine Shapes panel enabled me to turn them all into a unified object, with a single stroke around it; but each of the original objects is still a separate shape within that combination, allowing me to adjust each one independently.

The Eraser tool
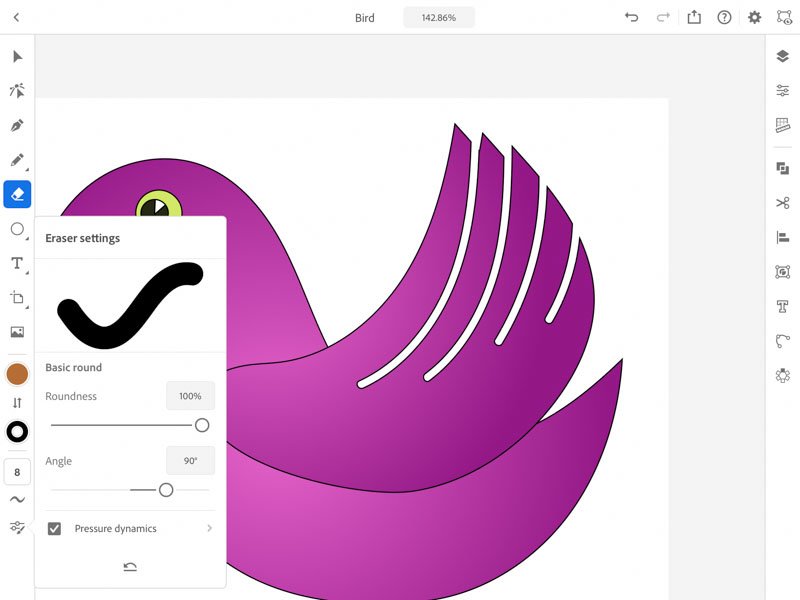
The Eraser in Illustrator deletes part of an object by dragging the tool over it. You can set the roundness and angle of the tool (if using an elliptical shape), and with the Smoothing value turned right up you can easily produce smooth, clear slots in your artwork. Note here that although this wing is made of three discrete objects, the effect is to erase all three as a single object.
very understandable
great
This was enlightening