
Microsoft SQL Server is one of the most powerful and widely used relational database systems in the world. It supports enterprise applications, business intelligence solutions, financial systems, e-commerce platforms, and advanced analytics. Before you can write queries or build dashboards, you must properly install and configure SQL Server.
This guide walks you through everything — choosing the right edition, downloading SQL Server, installing the Database Engine, setting up SQL Server Management Studio (SSMS), configuring authentication, and preparing your environment for professional SQL development.
What Is Microsoft SQL Server?
Microsoft SQL Server is an enterprise-grade relational database management system (RDBMS) designed to store, organize, and manage structured data. It supports high availability, strong security, fast performance, and seamless integration with modern applications.
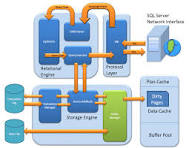
SQL Server consists of key components:
- Database Engine: The core service that stores and processes data
- SQL Server Management Studio (SSMS): A graphical tool for writing queries
- SQL Server Agent: Automates jobs and scheduled tasks
- SQL Server Configuration Manager: Controls SQL services and protocols
- Integration, Analysis, and Reporting Services: Optional BI components
To work effectively with SQL Server, you must install both the Database Engine and SSMS.
Choosing the Right SQL Server Edition
Before installing SQL Server, select the edition that matches your purpose.
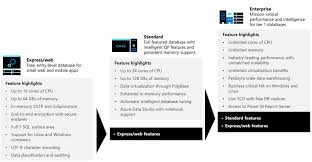
SQL Server Developer Edition (Free)
- Full enterprise features
- Best for practicing, learning, training, and development
- Not licensed for production workloads
SQL Server Express Edition (Free)
- Lightweight version
- Database size limit up to 10 GB
- Good for small projects and basic learning
SQL Server Standard / Enterprise (Paid)
- Used in enterprise environments
- Supports high workloads and mission-critical systems
For beginners, students, analysts, and developers, the Developer Edition is the most suitable.
System Requirements
Before installation, ensure your computer meets Microsoft’s requirements.
Minimum Requirements
- OS: Windows 10, Windows 11, or Windows Server
- RAM: 4 GB (8–16 GB recommended)
- Processor: 64-bit CPU
- Disk Space: Minimum 10 GB free storage
Recommended Setup
- SSD storage
- 16 GB RAM
- Quad-core processor
This ensures smooth performance when running multiple databases or large SQL queries.
Step 1 — Download SQL Server
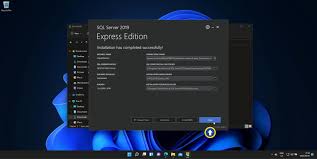
To install SQL Server:
- Visit the Microsoft SQL Server download page
- Select Developer Edition
- Download the installer (
SQL2022-SSEI-Dev.exe) - Run the installer
The SQL Server installer will show three options:
- Basic – Quick installation
- Custom – Recommended for full configuration
- Download Media – For offline setup
Choose Custom for full control and learning experience.
Step 2 — Install the SQL Server Database Engine

After selecting Custom, you will see the SQL Server Installation Center.
Steps:
- Click New SQL Server Stand-Alone Installation
- Accept the license terms
- Select Database Engine Services
- Choose Default Instance (recommended)
- Configure authentication
Authentication Options
- Windows Authentication: Uses your Windows account
- Mixed Mode Authentication: Allows SQL logins (including
sa)
Choose Mixed Mode → create a strong a password → add yourself as administrator.
Step 3 — Install SQL Server Management Studio (SSMS)
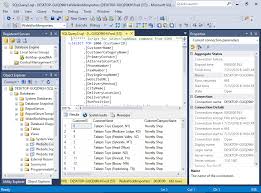
SSMS is essential for:
- Writing SQL queries
- Managing databases
- Creating tables, views, and stored procedures
- Monitoring system performance
- Backing up and restoring databases
How to Install SSMS
- Visit the official SSMS download page
- Download the installer
- Run installation
- Launch SSMS from Start Menu
Step 4 — Connect SSMS to SQL Server
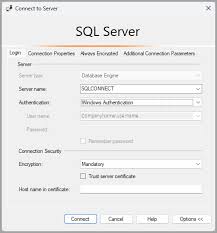
When you open SSMS, you must connect to your SQL Server instance.
Connection Settings:
- Server type: Database Engine
- Server name: Your computer name (default instance)
- Authentication:
- Windows Authentication
- SQL Server Authentication (use
saand password)
Click Connect and SSMS will load your server and system databases.
Step 5 — Configure SQL Server Settings
After installation, configure key settings using:
1. SQL Server Configuration Manager
Used for enabling:
- TCP/IP connections
- Named pipes
- Network access
- Service control
2. SSMS Security Settings
Used for:
- Creating logins
- Assigning roles
- Managing user permissions
3. Database Setup
You can create your first database using:
CREATE DATABASE TestDB;Step 6 — Test Your SQL Server Installation
To confirm that SQL Server works:
Open a new query window in SSMS and run:
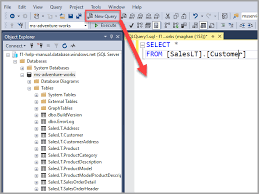
SELECT @@VERSION;
Then create a simple table:
CREATE TABLE Employees (
    ID INT PRIMARY KEY,
    Name VARCHAR(50),
    Salary DECIMAL(10,2)
);
Insert sample data:
INSERT INTO Employees VALUES (1, 'John Doe', 55000);
Retrieve the data:
SELECT * FROM Employees;
If these queries return results, your environment is fully functional.
Common Installation Errors and Fixes
1. Cannot Connect to Server
- Enable TCP/IP in Configuration Manager
- Restart SQL Server service
- Check the instance name
2. SQL Login Not Working
- Mixed Mode authentication may not be enabled
- Reset
sapassword
3. Installation Fails
- Check available disk space
- Install latest .NET Framework
- Disable antivirus temporarily
Final Verdict
Installing and setting up SQL Server is the foundation of becoming a strong SQL professional. With the Database Engine and SSMS properly configured, you are ready to:
- Write SQL queries
- Build databases
- Analyze data
- Manage tables, views, and stored procedures
- Develop BI and reporting systems
- Work with enterprise-level architectures
Your SQL Server environment is now fully prepared for hands-on practice and real-world projects.